Hello my friends! I know I've taken a long break from this series. Sorry bout that, I was held up with other projects and then my laptop crashed. It took a while to get it sorted out. Let's get to today's lesson now.


If you have any questions or suggestions, leave them in the comments section below.
In this lesson, we will learn how to make a Slip Stitch [Sl St] and then how to Fasten Off [FO] your work once you are done.
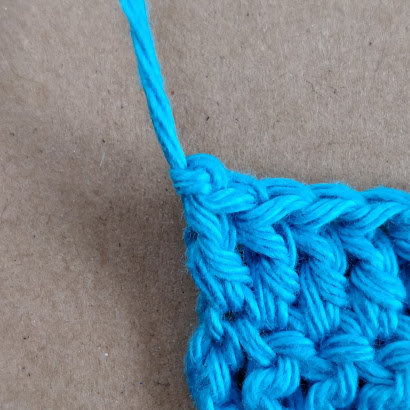
I have here with me 3 rows of 10 dc, and then I've made a ch 1.

Step 1 ~ Insert hook into stitch

Step 2 ~ Yo & pull up a loop


Step 3 ~ Now pull this loop through the loop already on the hook

This is how the Slip Stitch is made. I know that in this example I have used a dc as a base, but the sl st can be made on any stitch, even with a chain.
The next thing we are going to see today is how to finish your work and ensure it does not unravel. This is mostly refered to in patterns as Fasten Off or just FO.
Step 1 ~ Once you reach the end of your work, make a ch 1

Step 2 ~ Cut off your yarn with a reasonable length of tail

Step 3 ~ Pull out the loop completely


Step 4 ~ Tighten this knot but pulling on the tail.

You can find the video tutorials here below
~ Right Handed Version ~
~ Left Handed Version ~
Keep practicing these stitches, I will see you in the next lesson where we will learn how to change colors, attach new yarn & weave in your tails. You can find my other tutorials here.
If you have any questions or suggestions, leave them in the comments section below.
Subscribe to My Channel and hit the bell button to get notifications on new tutorials.
Follow @madewithlovebydaisy on Instagram to receive updates on new patterns & giveaways.
Happy Hooking...!
Daisy
Comments
Post a Comment