Hello my lovelies! Welcome back to my blog. We have completed the beginner lessons series & have progressed to simple patterns that use the stitches we have learnt. In case you haven't seen the beginner lessons, you can find them all right here.
In today's tutorial we're gonna be learning the Lemon Peel Stitch. It's one of those 'OMG! It's so simple & cute" sort of stitch. What I love about this stitch is that it can be adapte so easily for any project.
Let's get to the stitch now. As always I'm Laura Knitting coton and a 4.50mm hook.
To begin, chain in any odd numbers. For this tutorial I have chained 15.
In the next ch, make one dc.
For the rest of the row, continue with sc in next ch, dc in next chain till the end of the row. You must end with a dc in your last chain.
For row 2, chain turn, make an sc into the 1st dc, make a dc into the next sc. Continue this way all across.
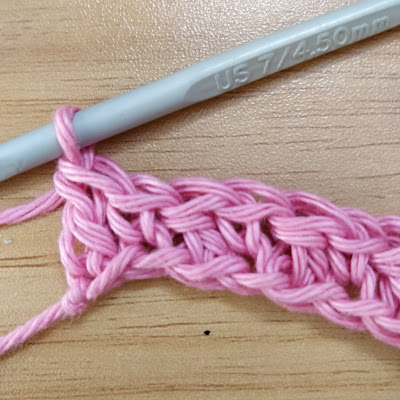
That's it.. That's the pattern for the Lemon Peel Stitch... We sc in all the dc, and dc in all the sc. Keep working like this as long as you want to.
The difference in height between the sc and dc, causes the dc to get pulled down. This gives a very interesting texture...
You can find the video tutorials here below
~ Right Handed Version ~
~ Left Handed Version ~
I hope you found this tutorial helpful. If you have any questions or suggestions, leave them in the comments section below. Subscribe to My Channel if you haven't already and hit that little bell button to get notifications on new videos. Follow @madewithlovebydaisy on Instagram to receive updates on new patterns & giveaways.
Happy Hooking...!
Daisy


Comments
Post a Comment